In the world of modern Java development, Spring Boot has emerged as a leading framework for building scalable, production-ready applications with ease. Introduced by Pivotal (now part of VMware) in 2014, Spring Boot simplifies the complexities of the traditional Spring Framework and accelerates the development process by providing a host of out-of-the-box features.
This article serves as an introduction to Spring Boot, covering its core concepts, advantages, and key components.
What is Spring Boot?
Spring Boot is an open-source framework built on top of the Spring Framework. It is designed to simplify the development of Java-based applications, particularly microservices. By eliminating the need for extensive configuration, Spring Boot allows developers to focus on writing business logic rather than boilerplate code.
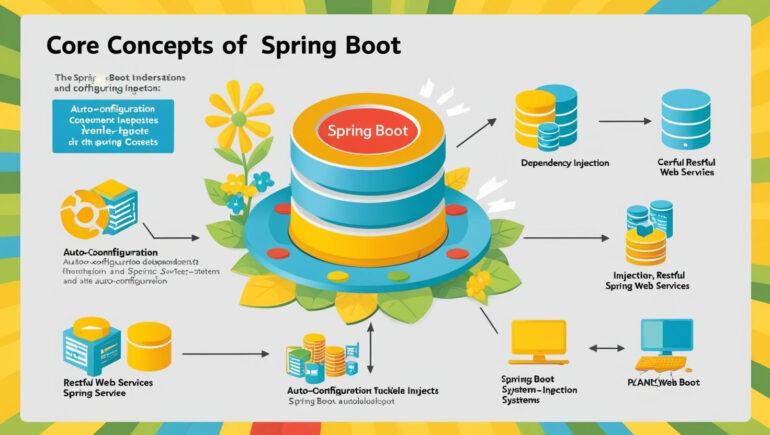
At its core, Spring Boot provides the following:
- Auto-Configuration: Automatically configures Spring applications based on the dependencies present in the classpath.
- Embedded Servers: Bundles lightweight web servers like Tomcat, Jetty, or Undertow, eliminating the need for external deployments.
- Opinionated Defaults: Offers sensible defaults to streamline development while still allowing customization.
- Production-Ready Features: Includes tools for monitoring, metrics, and application health checks.
Key Features of Spring Boot
1. Starter Dependencies
Spring Boot introduces “starters” to simplify dependency management. For example, the spring-boot-starter-web dependency brings in everything you need to create a RESTful web application.
<dependency>
    <groupId>org.springframework.boot</groupId>
    <artifactId>spring-boot-starter-web</artifactId>
</dependency>
2. Spring Boot CLI
The Spring Boot Command Line Interface (CLI) is a tool that enables developers to quickly prototype applications using Groovy scripts.
3. Embedded Servers
Spring Boot applications can run independently without requiring an external web server. You can start your application by simply executing the main method.
4. Actuator
The Spring Boot Actuator provides a set of tools to monitor and manage applications. It exposes endpoints for health checks, metrics, and environment properties.
5. Externalized Configuration
Spring Boot allows configuration properties to be defined externally, making it easy to adapt applications to different environments (e.g., dev, test, production) without code changes.
Benefits of Using Spring Boot
- Rapid Development: With auto-configuration, starter dependencies, and embedded servers, developers can focus on functionality rather than setup.
- Microservices-Friendly: Spring Boot is a popular choice for creating microservices, thanks to its lightweight nature and support for RESTful APIs.
- Rich Ecosystem: Built on top of the robust Spring Framework, Spring Boot benefits from a vast ecosystem of tools and libraries.
- Community Support: With a large and active community, developers can find solutions, tutorials, and plugins for almost any challenge.
- Seamless Testing: Spring Boot provides excellent support for unit and integration testing, including utilities like
@SpringBootTestand MockMVC.
MVC Architecture in Spring Boot
The Model-View-Controller (MVC) architecture is a design pattern that separates an application into three interconnected components:
- Model: Represents the data and business logic of the application. It manages the state of the application and interacts with the database or external systems.
- View: Handles the presentation layer, rendering the user interface to display data from the model.
- Controller: Acts as an intermediary between the Model and the View. It handles user input, processes requests, and returns appropriate responses.
Spring Boot makes implementing the MVC architecture straightforward by leveraging the Spring Framework’s powerful features. Here’s how the MVC components work in Spring Boot:
1. Model
The Model is typically represented by Java classes (e.g., POJOs) and is managed through frameworks like Spring Data JPA. For example, a User entity can be created as follows:
import jakarta.persistence.Entity;
import jakarta.persistence.Id;

@Entity
public class User {

    @Id
    private Long id;
    private String name;
    private String email;

    // Getters and setters
    public Long getId() {
        return id;
    }

    public void setId(Long id) {
        this.id = id;
    }

    public String getName() {
        return name;
    }

    public void setName(String name) {
        this.name = name;
    }

    public String getEmail() {
        return email;
    }

    public void setEmail(String email) {
        this.email = email;
    }
}
2. View
In Spring Boot, the view layer can be implemented using technologies like Thymeleaf, JSP, or Angular/React (for front-end development). Here’s an example of a Thymeleaf template (hello.html):
<!DOCTYPE html>
<html xmlns:th="http://www.thymeleaf.org">
<head>
    <title>Spring Boot MVC</title>
</head>
<body>
    <h1 th:text="${message}">Hello, Spring Boot!</h1>
</body>
</html>
3. Controller
The Controller processes incoming requests, interacts with the Model, and returns a response (e.g., a view or JSON). Here’s an example of a basic controller:
import org.springframework.stereotype.Controller;
import org.springframework.ui.Model;
import org.springframework.web.bind.annotation.GetMapping;

@Controller
public class HelloController {

    @GetMapping("/hello")
    public String sayHello(Model model) {
        model.addAttribute("message", "Hello, Spring Boot MVC!");
        return "hello"; // Returns the Thymeleaf template "hello.html"
    }
}
Building Your First Spring Boot Application
Here’s a step-by-step guide to create a simple Spring Boot application:
Step 1: Set Up the Project
You can generate a Spring Boot project using the Spring Initializr. Select the desired dependencies (e.g., Spring Web, Spring Data JPA) and download the generated project.
Step 2: Define the Main Application Class
import org.springframework.boot.SpringApplication;
import org.springframework.boot.autoconfigure.SpringBootApplication;

@SpringBootApplication
public class DemoApplication {
    public static void main(String[] args) {
        SpringApplication.run(DemoApplication.class, args);
    }
}
The @SpringBootApplication annotation enables auto-configuration, component scanning, and configuration properties.
Step 3: Create a REST Controller
import org.springframework.web.bind.annotation.GetMapping;
import org.springframework.web.bind.annotation.RequestMapping;
import org.springframework.web.bind.annotation.RestController;

@RestController
@RequestMapping("/api")
public class HelloController {

    @GetMapping("/hello")
    public String sayHello() {
        return "Hello, Spring Boot!";
    }
}
Step 4: Run the Application
Run the main method in DemoApplication. The application will start on the default port 8080. You can access the GET /api/hello endpoint at http://localhost:8080/api/hello.
Conclusion
Spring Boot has revolutionized the way Java applications are developed, making it faster and easier to build robust and scalable solutions. Its simplicity, combined with powerful features, has made it a go-to framework for developers worldwide.
Whether you’re building microservices, REST APIs, or full-stack applications, Spring Boot provides the tools and flexibility you need to succeed. Dive in, and experience the power of Spring Boot for yourself!